Esplora has got you covered with these set of experiments for a Home Lab project. Some of them might be slightly messy but it’s fun and educational. All you need to do is to gather some basic kitchen equipment and simple ingredients and you’re good to go! You might need the help of an adult in some experiments.
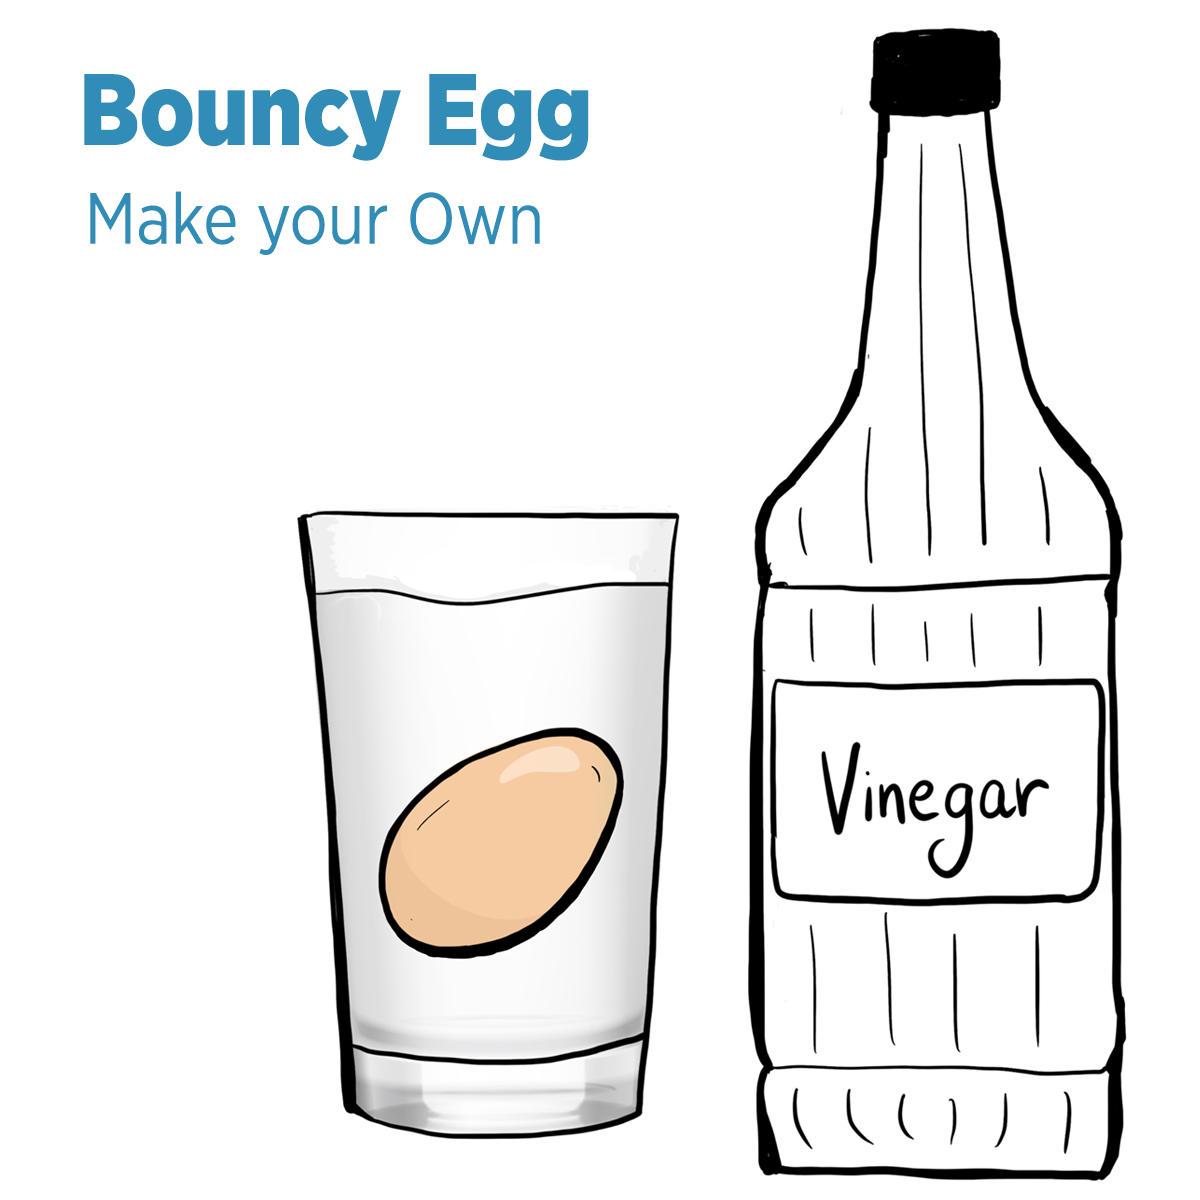
This experiment is the simplest one, yet it takes the longest to see the result. We will be looking at the shell of the egg dissolving in vinegar. The eggshell is made of a material called calcium carbonate and, when it meets the acidic vinegar, it starts a chemical reaction. The eggshell itself start to dissolve and in the process produces carbon dioxide gas. The inside of the egg, particularly the egg white, stays intact since its membrane is still attached and the egg whites solidify due to the chemical reaction.
Items needed:
• 300 ml white vinegar
• 1 raw egg
• Glass or mug
Method
Place your raw egg in a glass or mug filled with white vinegar.
Tip: use a clear glass vessel to see the reaction better. After a few minutes you will already notice small bubbles forming around the egg. Those are carbon dioxide bubbles. You’ll notice that after the first 24 hours, the egg will have started to lose its shell. Change the vinegar after the second day and then you will need to leave it in the vinegar for a week.
Each day take photos and record the changes you can see on the egg. Once the week is up, remove the egg from the vinegar, rinse it with water and you can feel the rubbery texture of the egg. It can even bounce on surfaces, just like a rubber ball!
Unleash your inner scientific artist and use chemistry to paint an egg inspired by nebulas. Nebulas are giant clouds of dust and gases in space which are very colourful since different gases emit light of different colours.
This experiment makes use of chemical reactions. The chemical reaction is a simple one which is done by mixing an acid (white vinegar) with an alkali (baking soda). The colour comes from food colouring, but the chemical reaction helps the colour to fuse with the eggshell. Check out what you’ll need and the method below to find out how to do egg nebulas.

Items needed:
• Bicarbonate of soda / baking soda
• White boiled eggs (as much as you wish)
• White vinegar
• Bowl
• Egg cup
• Smaller bowls for colour mixing (quantity depends on the number of colours you’ll create)
• Paint brush
• Paper towel
Method:
1. Look up images of various nebulas online and select the ones you like the most so that you recreate the colours accordingly. Some names of nebulas are Orion Nebula, Crab Nebula, Eagle Nebula and Ring Nebula.
2. In separate bowls, mix some bicarbonate of soda with food colouring of your choice adding a few drops of water to form into a paste.
3. Using a paintbrush, start putting the coloured bicarbonate of soda paste onto the egg replicating the pattern of the nebulas you chose. You can place the egg on an egg cup while you paint.
4. Once you’ve painted the whole egg, dip the egg into the bowl of white vinegar and watch as it fizzes.
5. Remove the egg from the vinegar and lightly pat it dry with a paper towel.
6. The eggshell has now absorbed the colour from the bicarbonate of soda paste.
Crystals are natural and very fascinating formations. They can form different materials such as ice in the form of snowflakes or stone such as gems. For this experiment, we’re going to be using salt, which is in itself a crystal and we have all the information we need to make our own salt crystal formations.
Crystals form when there is a concentration of a chemical in a liquid example: Salt (chemical) and water (liquid). Salt is naturally very soluble in water but there is only a specific amount of salt which can be dissolved in a particular amount of water. If you keep adding salt to the same glass of water, there will come a point when the solubility point of water is exceeded. This means that the salt content in the glass of water will be so high that no more salt will be able to dissolve in it. We call this solution a saturated solution.
When a small salt crystal is dropped into this saturated salt solution, the salt crystal will grow into a bigger crystal. That small salt crystal is called a seed. If something else is added to the solution which is not salt, salt will eventually start growing onto it in crystal form, just like the experiment we’re going to do here.

Items needed:
• 120ml water
• 120g salt*
• Small pan
• Heat proof glass or jar (clear)
• String (ideally wool such as yarn)
• Pencil
• Food colouring
• Help of an adult 😉
*(There are different types of salt and each one gives a different outcome. Normal table salt works great though it takes longer to see crystal growth. Iodized salt does not work very well. Epsom salt creates smaller crystals but faster than table salt. Alum salt works the fastest)
Method:
1. Ask an adult to help you with this step to heat the water in the pan just until it begins to boil. Do not let it reach 100% boiling point.
2. Take the pan off the heat, add the salt and stir constantly. If all the salt is dissolved add some more until the water is saturated. The water should be clear with some salt grains remaining in the bottom of the pan.
3. Pour the saturated water in the glass up to the top. Make sure to pour only the clear water and not the remaining salt grains.
4. Add a few drops of food colouring of your choice to the water. The more colour, the brighter the crystal colour will be.
5. Tie the string to the pencil’s centre. The pencil should be long enough to lie across the top of the glass.
6. Balance the pencil on top of the glass with the string in the water. If the pencil keeps rolling off, try using some tape or bluetac to secure it in place.
7. Cut the string long enough to hang in the water freely but avoid it touching the bottom or sides of the glass.
8. Place the glass in a safe space where it will be untouched. The crystal will grow larger if it’s in a shaded space with the least vibrations.
9. Check the crystal each day to see how it is changing every day. The process might take a couple of days and sometimes even a week, but we promise that the result will be beautiful.
10. Take a photo of your crystal and share it with us on social media; Facebook @esploramalta or on Instagram #esploramalta
Tip: Try out the experiment with different types of salt to see the different kinds of crystals you might grow.


")