Make your own snowflake ornament
We get it! Snow is just wonderful and so very Christmassy but unfortunately our climate here in Malta does not allow us to experience that. Snow forms when the atmospheric temperature goes down to below 0°C and the air is moist. The water vapour usually condenses into cloud droplets but when it snows, it’s because the vapour freezes and form snowflakes instead. However, in Malta the temperature rarely goes below 5°C, however the lowest temperature we’ve ever experienced was 1.4°C in January of 1981.
If you look at snowflakes very closely, you will notice how amazing their pattern is. The snow that forms around a frozen air particle is completely symmetrical and forms various patterns. In this activity, we are going to explore the symmetry of a snowflake and also add a touch of colour to it just for the fun of it 😊. But not just that. We shall be testing out the best paper for this experiment. Let’s get started!
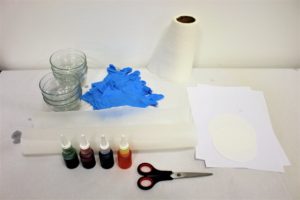
Get your materials ready!
Try it out!
Step 1
Cover the workspace which you will work on to avoid any stains, since food colouring tend to be a bit messy.
Step 2
Prepare the paper that you will be experimenting with and cut them into circles. We chose to do snowflakes of different sizes, so we cut circles of various diameters.
Step 3
Wear the gloves because it’s about to get messy. In a bowl, mix a little water (about 50ml should be fine) with some food colouring of your choice. The more food colouring you add, the more vibrant the colour will be. Repeat this step for every colour you choose to make. The more colours you do, the more colourful your snowflakes will turn out.
Step 4
Once all the colours are done, fold the circles like so:
Step 5
When the circle is folded and using sharp scissors, cut out the snowflake pattern you want. This will give you a perfectly symmetrical pattern throughout. Get an adult to help you, since for thicker paper, it might be a bit difficult to cut through the folds. Don’t open the snowflake just yet.
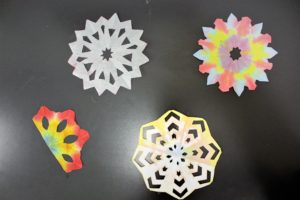
You are free to make your own design of snowflakes but here are a few ideas to inspire you.
Step 6
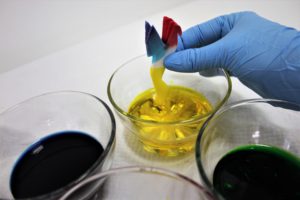
Now for the messy part. Start dipping the still folded snowflake into your preferred colours. We suggest dipping in different colours. The colours will mix as they are absorbed.
Step 7
Gently open all the folds of the snowflake and allow it to dry.
Step 8
Repeat these steps with different paper types in various sizes and compare the process and outcome of each one of them.
 |
 |
 |
Take it further!
Now that you have completed our snowflake making experiment, ask yourself these questions to explore further the science behind this experimental project.
Absorption is the process by which a material soaks up a liquid. The colour in the water will allow us to see the water being absorbed by the different types of paper.
Making snowflakes showcases radial geometry, repetition, and multiplication. The process of folding a circular piece of paper, making a few strategic cuts then opening up the snowflake to see your cuts repeated around a centre point is a fantastic way to visualize multiplication and radial designs!
In nature, the pattern of each natural snowflake is unique and no two snowflakes can be identical. This is due to the variation of temperature, humidity, and water vapour content in the atmosphere. Every tiny change in any of these conditions will drastically affect the formation of the snowflake’s pattern.
Show us what you’ve made! Take a photo of at least 4 of your favourite activities from Esplora’s Science Advent Calendar. Trust us, you’ll need them 😉
Share your creation/experiment/project with us on social media
by tagging us on social media @esploramalta #esploramalta #getcuriousgetinspired